Strategy
Company Update
Say Hello To The Next Ad’s Automatic Booster
Dec 18, 2018
Company Update
Dec 18, 2018
Boosting just got a whole lot easier. Constantly looking for your page’s best-performing content and then promoting those social media posts can often be a repetitive, tedious task. With the newly introduced Automatic Booster, you can tell us which Facebook page posts to look for and we’ll automatically create campaigns to boost them for you! We’ll monitor your page and publish a campaign as soon as we see a post that meets your requirements. Here’s how it’s done.
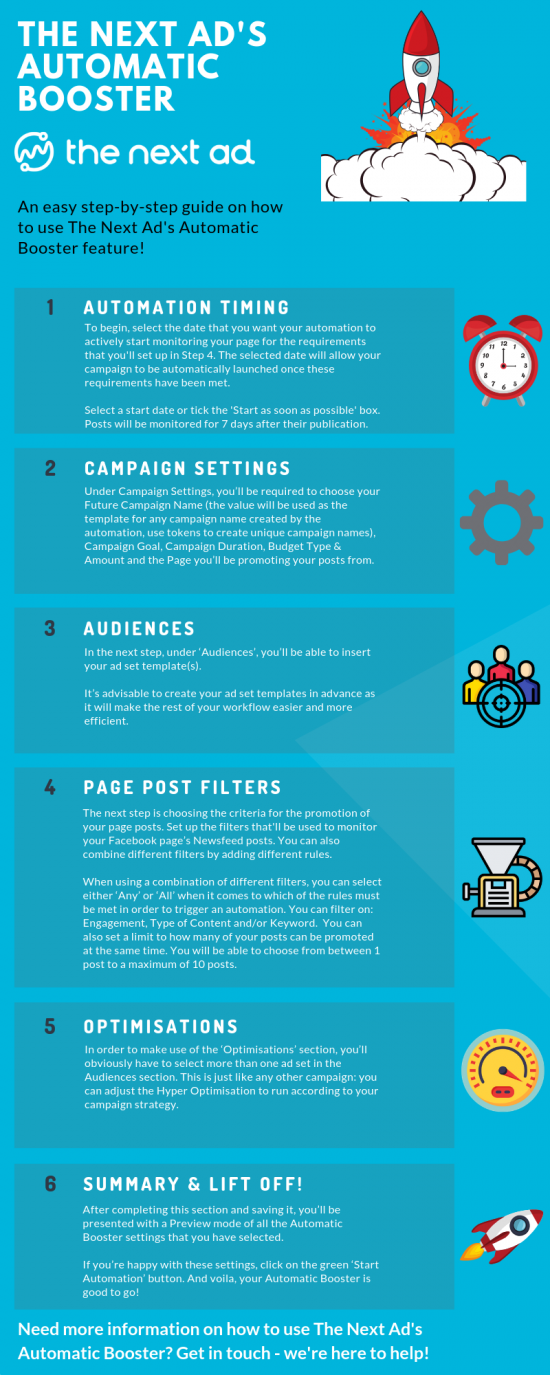
It’s time! Are you ready for the launch of The Automatic Booster?
This feature is set to make life a whole lot easier for our advertising customers.
Here’s why.
Sometimes content and posts perform extremely well, possibly even exceeding the expectations of the content creators with the number of likes, comments and shares that are pouring in. On another day, the opposite can be true with engagement a bit harder to come by. It is important to know which of your posts are performing well as these can then be boosted to achieve even greater results than first achieved. However, constantly monitoring your Facebook Page’s activity, finding out which of your posts are the best performers and manually boosting them can often be a very time-consuming task for advertisers and content creators alike.
So how can we solve this?
Well, with the help of the Automatic Booster you can decide which posts get promoted based on the criteria and filters that you decide to set up. These conditions can be filtered in order to only promote the posts that meet the pre-determined criteria.
Before we start setting the condition for the Automatic Booster, there are a couple of things you’ll need to take care of first.
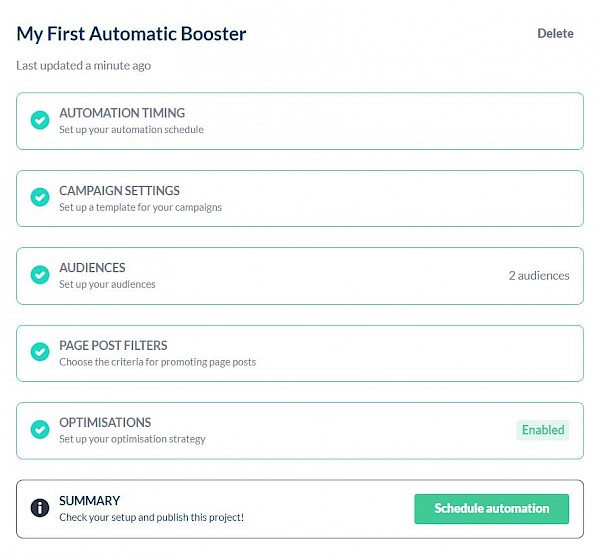
First of all, you can set up your ‘Automation Timing’. Here you’ll have the option to select the date that your automation will actively start monitoring your page for the set requirements to automatically launch the campaign once they’ve been met. However, whether you want to manually select a start date or just tick the ‘Start as soon as possible’ box is up to you.
Deciding on an end date for your Automation Timing is optional as you can also either manually select a date or select the ‘No end date’ box. Once the end date has been reached the Automatic Booster will no longer monitor your feed or create new campaigns. Optionally, it can also pause all campaigns that have been published as a result of the automation.
When an automation is activated, we’ll start monitoring your page feed to check if any page post meets the requirements. Posts will be monitored for 7 days after their publication. After this, the post will no longer be monitored to ensure the recency of your campaigns.
This is followed by filling in the required information for the ‘Campaign Settings’ and ‘Audiences’ sections.
Under Campaign Settings, you’ll be required to choose your Future Campaign Name (the value will be used as the template for any campaign name created by the automation, use tokens to create unique campaign names), Campaign Goal, Campaign Duration, Budget Type & Amount and the Page you’ll be promoting your posts from.
Then, under ‘Audiences’, you’ll be able to insert your ad set template(s). It’s advisable to create your ad set templates in advance.
The next step is where you’ll have to choose the criteria for the promoting of your page posts.
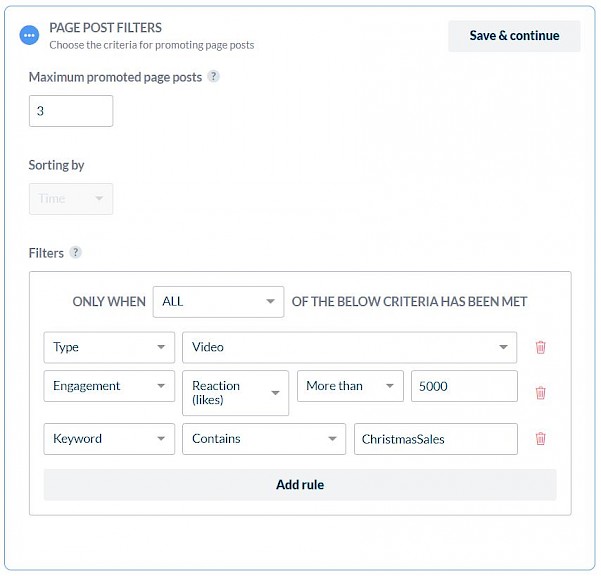
Here you can set up the filters that’ll be used to monitor your Facebook page’s Newsfeed posts. You can also combine different filters by adding different rules. When using a combination of different filters, it’s good to note that you can select either ‘Any’ or ‘All’ when it comes to which of the rules must be met in order to trigger an automation.
If you select ‘Any’, then any post meeting any one of these pre-set requirements will be automated, whereas the ‘All’ option will require all of the pre-set conditions to be met before a post can be automatically promoted.
Once a Page Post meets the requirements that you have set, a campaign will be automatically created and published based upon that specific Page Post and the campaign template you’ve started creating in the previous and next steps.
Before discussing the specific page post filters, it’s useful to mention that you can set a limit to how many of your posts can be promoted at the same time. You will be able to choose from between 1 post to a maximum of 10 posts.
The maximum number of promoted page posts equals the maximum number of campaigns that are created and running while the automation is active. This is based on the principle of a first-in-first-out basis.
Example: If you’ve set the maximum number to two page posts, a maximum of two campaigns will run at the same time, if a third post meets the requirements, the campaign with the earliest start date will be paused and a new campaign based on the newest post will be published.
Here are some examples of what you can filter your posts on and how they can help you in certain situations:
Choose this filter if you would like to only promote posts if/when they hit a certain number of likes, comments or shares. Examples: “Only boost posts that have received more than 150 likes.” “Only boost posts that have received more than 50 comments.”
This filter is about the types of post that you would like to see automatically boosted. Examples: “Only boost video posts that have received over 50 comments.” or “Promote image posts that have received over 100 likes.”
Finally, here you can filter on specific keywords. For example: “Boost only the posts that contain the words ‘Sale’ and ‘Car’.” Conversely, you can also filter on specific campaigns that do not contain a specific keyword. For example: “Boost image posts that do not contain the word ‘Halloween’.”
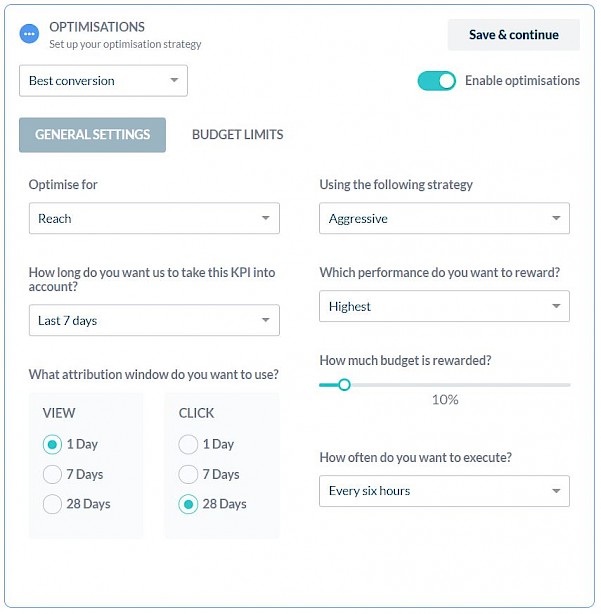
In order to make use of the ‘Optimisations’ section, you’ll obviously have to select more than one ad set in the Audiences section. This is just like any other campaign: you can adjust the Hyper Optimisation to run according to your campaign strategy. To see how to set up the Hyper Optimisation, click here.
After completing this section and saving it, you’ll be presented with a Preview mode of all the Automatic Booster settings that you have selected. If you’re happy with these settings, click on the green ‘Start Automation’ button. And voila!
Boosting social media posts can be a highly important strategy in a company’s quest to get more likes and engagement on platforms such as Facebook and Instagram. The ability to implement automated post boosting can, therefore, be a very interesting and important option for businesses as they seek to reduce the time it takes to increase their engagement, web traffic, conversions and click-through rate. On top of helping you boost posts, this feature can also support you in your Traffic, Reach, Video Views and Brand Awareness objectives.
Want to try this out for yourself? Sign up to The Next Ad’s free trial and find out if it can help you take your social media business to the next level!